Quickstart
This walks you through one small automation end to end: an external system posts a request, Honeybase opens a task for someone to handle it, and a Slack channel gets a heads-up. Ten minutes, and you will have touched every part of the model — a process, a released workflow, a run, a task and an integration.
You need a Honeybase account and permission to build workflows. A Slack connection is optional — skip step 5 if you do not have one yet.
1. Connect Slack (optional)
Open Integrations → Add integration and pick Slack. The Slack setup guide lists exactly which token to paste and where to find it. Every connection you add shows up here, masked, and is referenced by name from your workflows — the credential itself never enters a workflow definition.
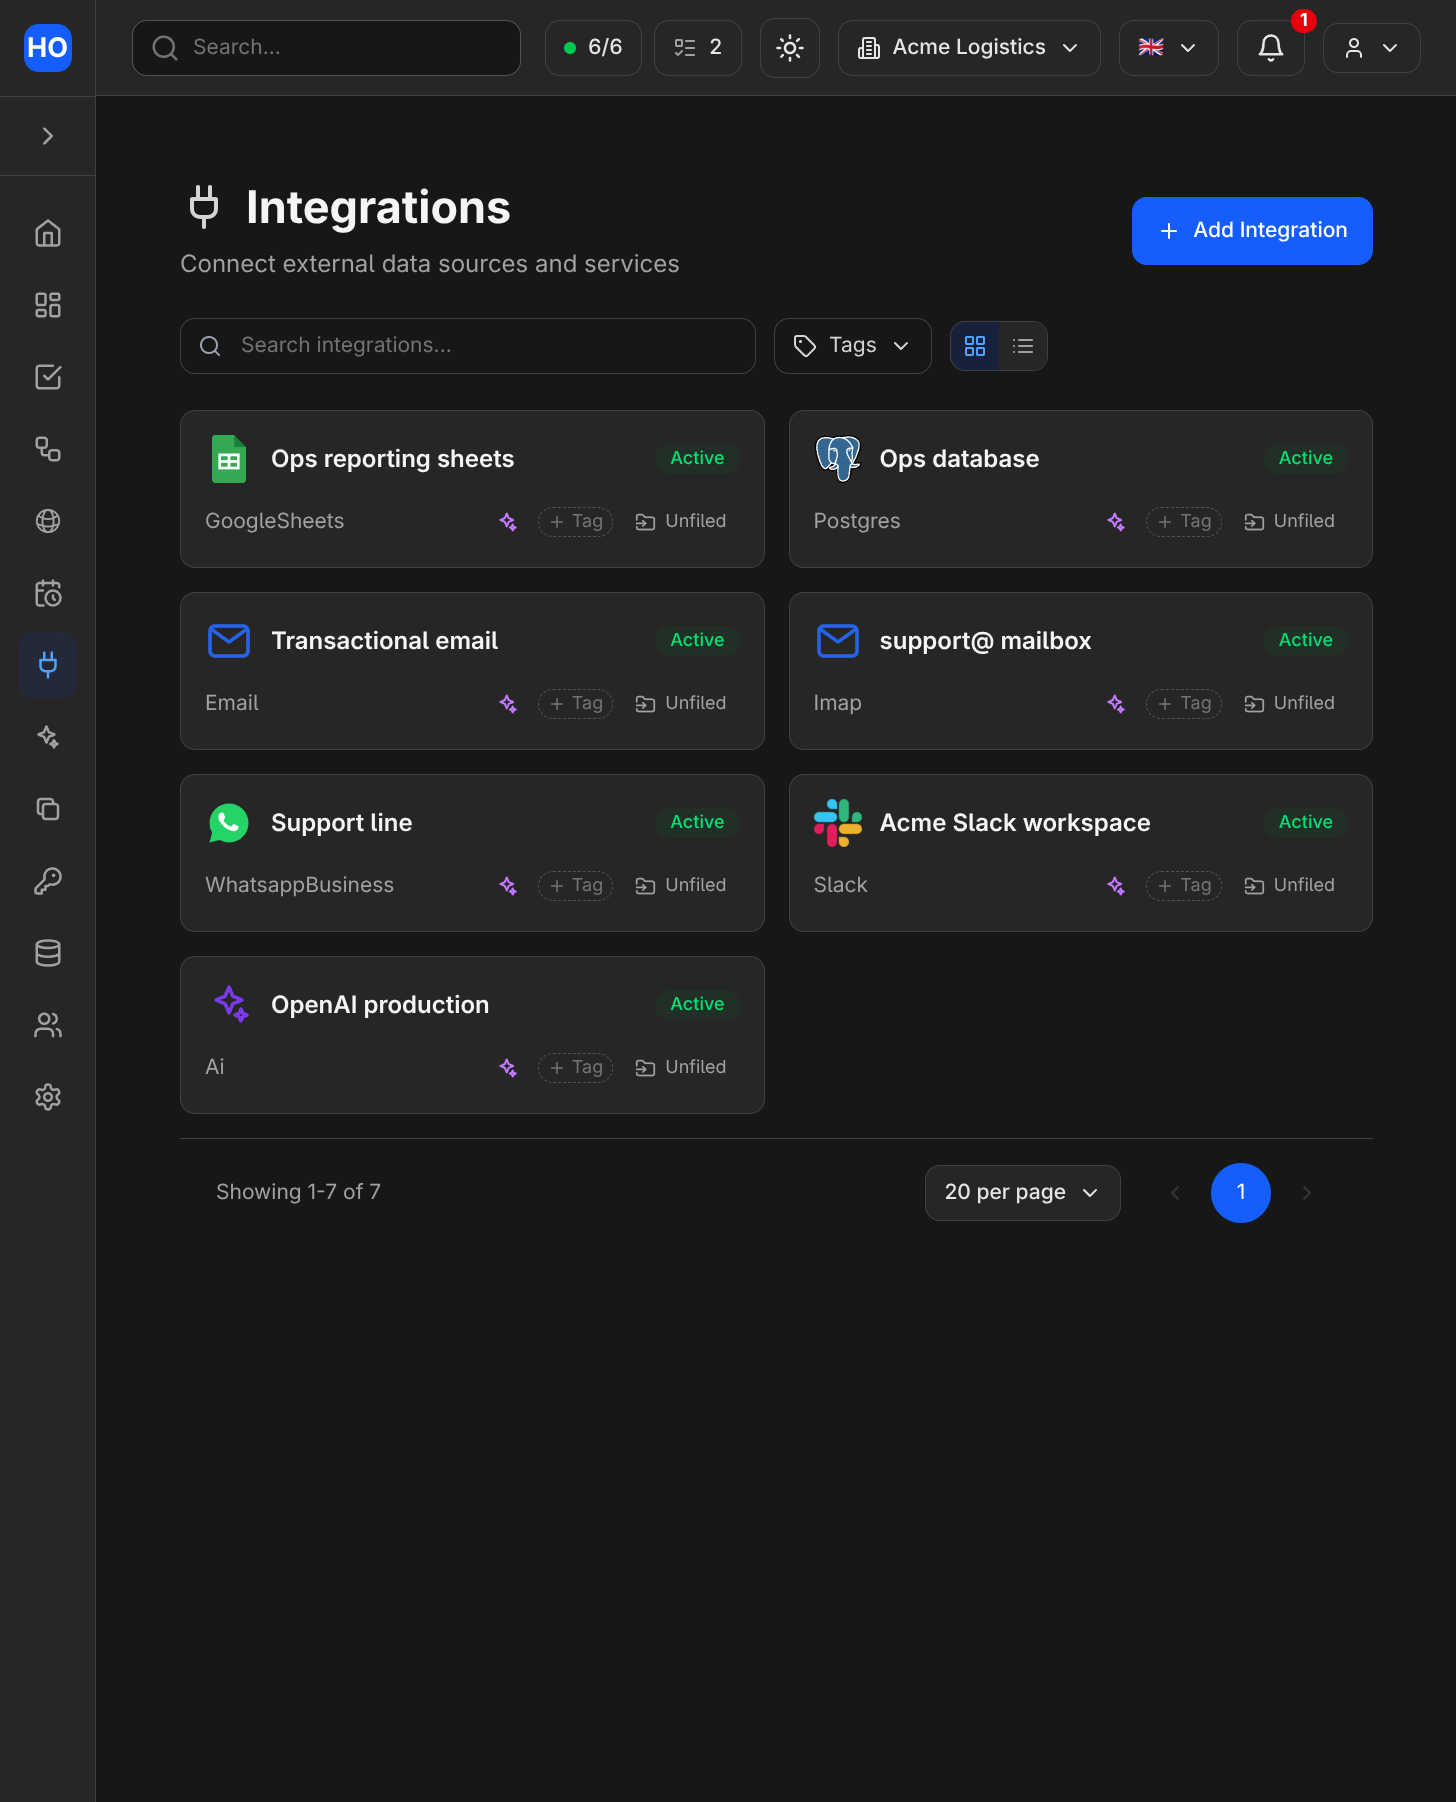
Each integration is a saved, named connection. Workflow nodes point at the connection, not the secret behind it.
2. Create a process
Go to Processes → Create new process, name it First automation, and open it. A new process starts with a draft workflow containing a webhook trigger and a starter step — that is your canvas.
Everything you do next happens on the draft. Nothing you build runs until you release it in step 6; a trigger sitting on a draft is inert. This trips people up exactly once, so it is worth saying up front.
3. Shape the trigger
Click the Webhook Trigger node. Its result is whatever gets POSTed to the
process's URL. Put a realistic sample in the payload field so the rest of the workflow
has something to reference:
{ "customer": "Nordwind Retail", "message": "Need a callback about order #4821" }
That sample is the contract you build against. At runtime the real request body replaces it.
4. Create a task
Add a Create Task node and connect the trigger to it. Configure it to turn each request into a work item:
- Task name —
Callback: {{ Trigger.result.customer }} - Description —
{{ Trigger.result.message }} - Assignee — a person, or a Team with a method like Least work so it lands on whoever is most free. Team routing consults availability, so nobody who is off gets the task.
- Due date — a relative date, say one day, with avoid weekends on.
Fields that take a {{ }} block read from the run's data; {{ Trigger.result.customer }}
pulls the value straight out of the payload above.
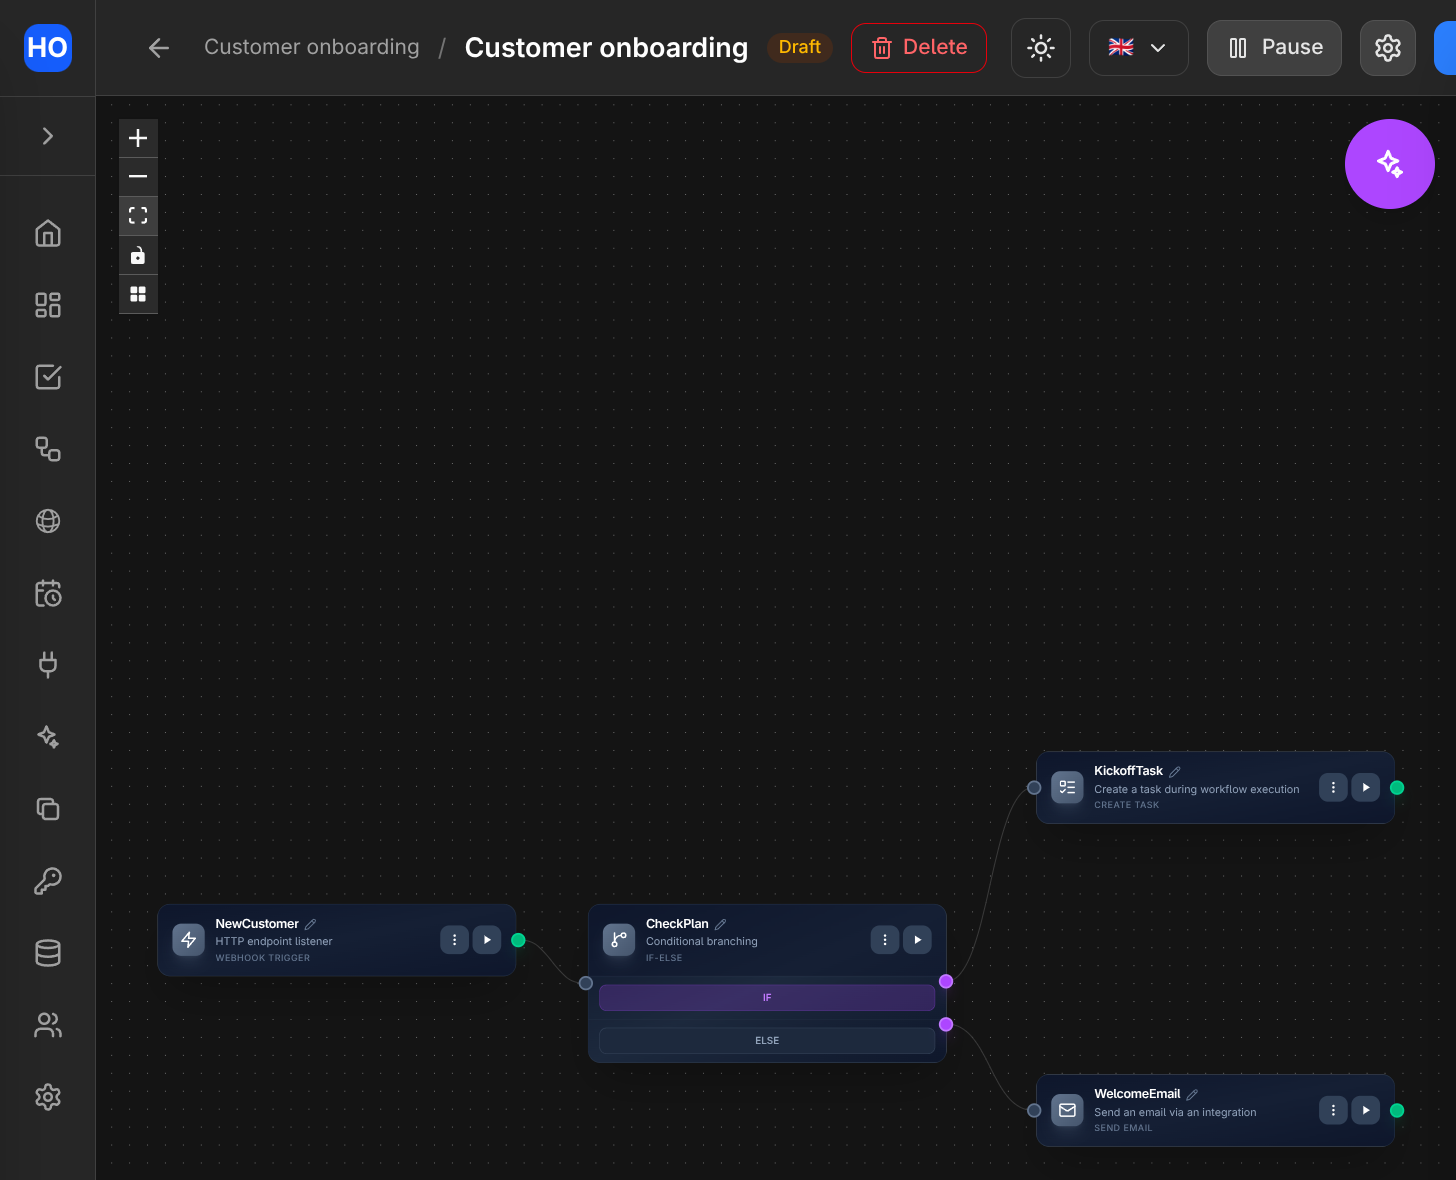
The editor. Nodes connect left to right; each node's output is addressable by name from every node downstream.
5. Post to Slack (optional)
Add a Slack node after the task, pick your connection, choose a channel, and write a message that pulls from the run:
New request from {{ Trigger.result.customer }} — task created.
The Create Task node's result includes the new task's id and the assignee, so the message can say who it landed on.
6. Test, then release
While building, select any node and Run it: Honeybase resolves the steps it depends on and runs those first, so you can test the task node without firing the whole workflow. These editor test runs are for you and never enter run history.
When it works, Save, then Release — this stamps the workflow as version 1.0 and freezes it. Finally, make sure the process is not paused. Automated triggers only fire from the current release of an unpaused process.
7. Fire it and read the run
POST your sample body to the webhook URL (copy it from the trigger node):
curl -X POST 'https://<your-webhook-url>' \
  -H 'Content-Type: application/json' \
  -d '{ "customer": "Nordwind Retail", "message": "Need a callback about order #4821" }'
Open the process's run history. Your run is there, and clicking it shows what each node received and produced — the same view you will live in whenever something needs debugging.
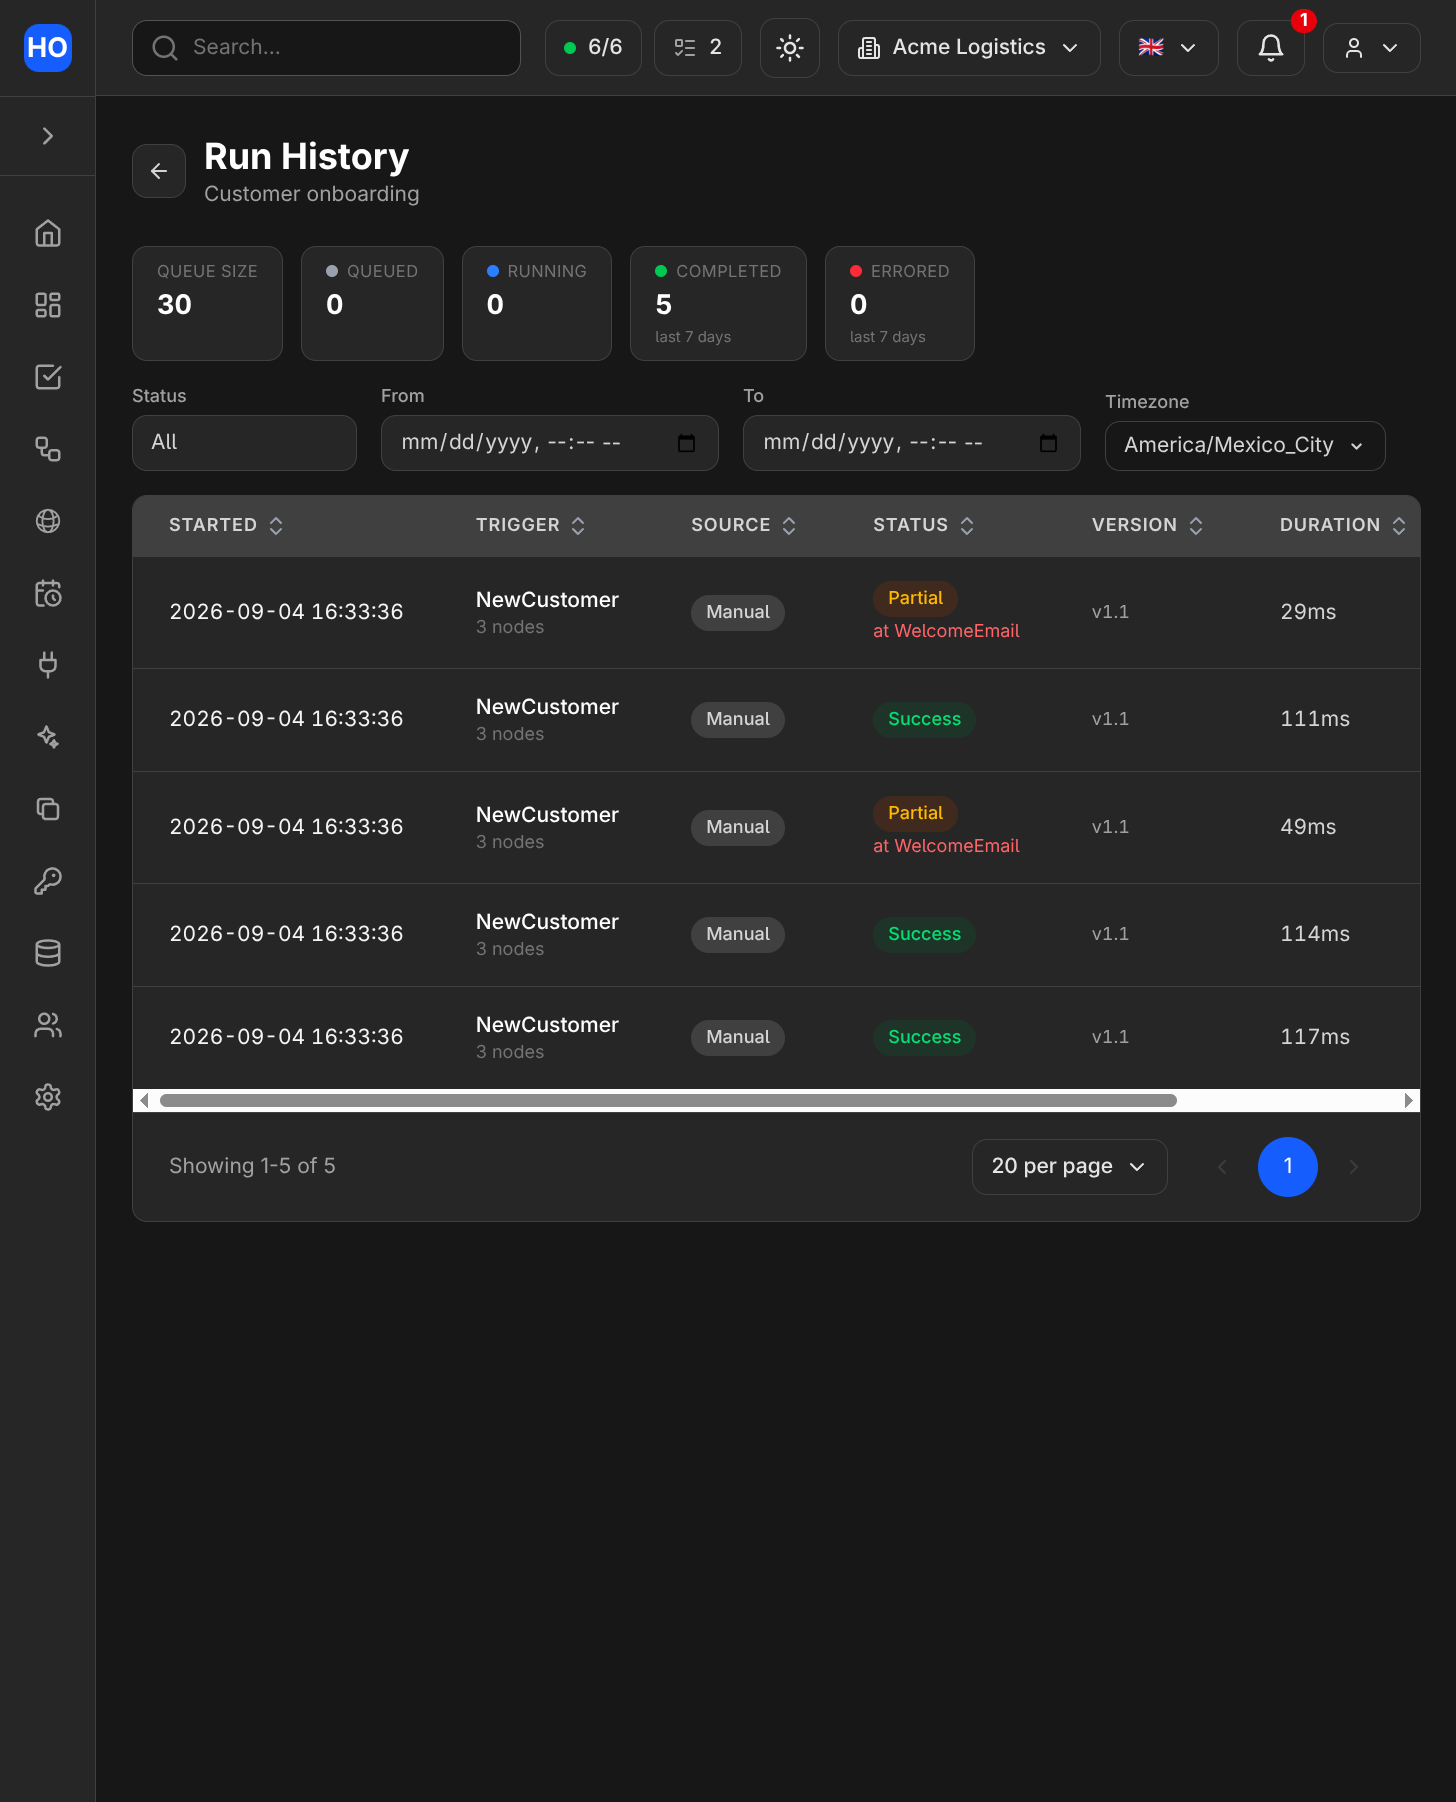
Run history records every execution node by node. A run that half-succeeds is marked Partial and names the node that errored.
Where to go next
- Let Barry build it. The AI copilot can draft a workflow like this from a sentence — describe the automation and approve the steps it proposes.
- See fuller examples. The use cases build real workflows: routing inbound messages, syncing form responses to a sheet, escalating overdue work.
- Automate from outside. Everything you did here is reachable over the GraphQL API with an organization API key.